Showing posts with label sewing skills. Show all posts

Saturday, 14 April 2018

Sewing Pattern Review: Rebecca Page Pippa Pants & Ultimate Patch Pocket Hack!


I love comfy pants. 

And pockets.

And ruching. 

And Rebecca Page Patterns. From the beginning of my "Sew-My-Wardrobe" adventures, I was drawn in by the Madison top, and then she took a chance on me when I applied for (and got into!) my first sewing pattern testing group!  

I've had the Pippa Pants pattern for a few months now, but had other projects and testing on the go.  But with cabin season coming up, and a lovely fleece lined Cotton Lycra sitting around for months from Water Tower Textiles , the Pippa pattern finally called out to me to just get'r done. 

Love the look of the Pippas!  

Front with 5 out of 4's Escapade Top!

Side view and the Circle Cardie!

Other side and Migraine face


But Pippa Pants lack what I love in me-made pants (because stores generally sew in fake pockets for ladies pants to tease them when they get home. Poor unused fake pockets).

*BUT* Rebecca Page also has the Ultimate Patch Pocket Pattern that I've used a few times to add pockets to existing clothing...so I figured I'd see how the Pippas fit before adding the pockets on. 

POCKETS!

First off, I'm 5'2", and the patterns are drafted for a 5'6" tall woman. I measured my inseam, and compared it to the pattern, deciding 4" off the length would be okay.  

Now I was a bit hesitant, as I have another pair of comfy pants made from similar fleece lined fabric, and I cut too much off the hem initially and have added two cuffs to it since, as the fabric does ride up over time.  I wanted to ensure the Pippas were a bit long to take the "sticking" factor of the fabric into consideration. They are about 1/4"-1/2" long, but for the sake of not looking like I hemmed my pants too short again, that's okay. I'm also a *LOT* more experienced at hemming and sewing with knits now vs last spring when I sewed my other pair of (I have no idea what pattern) comfy pants. 

So once the length was decided, the pattern happily ran the length of the fabric wonderfully - I was able to use my 1 meter of fabric and have some left over for some more Winter Wear Designs Alpine Fingerless gloves - a necessity in life since I lost finger circulation. And maybe a pair of comfy socks too. I can do a *LOT* with a meter of fabric!  

The ease of instructions made the Pippa pants a quick sew - and in about an hour and a half, my Pippas were complete.

I opted for:
- Full Length
- Ruched Side Ties
- My "Hack" of adding the Classic Patch Pocket 

The Ruching is awesome for anyone looking for this style of pants, but really just wants to be comfortable and feel awesome without feeling self conscious about their mid section. 

Look at the Ruching and POCKET!

I feel the flat front is best for anyone who has less confidence issues about their mid-section. 

That's why we sew, right? To make clothes that make us feel our most beautiful and confidant.  Clothes that fit properly. And really, it's a great stress reliever and way to be creative. 

And the pockets. 

I put on my finished pants, and pinned the pockets where I felt they looked best.  

The top side I matched up with the bottom of the band seam, and it is 1.5" away from the centre seam on either side. 

I sewed the pocket on in two steps - the side section (furthest away from the centre), and then from the top (and the band seam), and 90 degrees angle turn to finish off the curved edge down and towards the side section.  

Make sure to use a lot of pins, and hold the fabric tight (but not TOO tight) while pinning to ensure it sews on smoothly.  Sew slowly to avoid any weirdness in the fabric (pocket or pants), and voila!  

Instant pockets!  

Next pair I may put back pockets too, but I do think that my behind does look rather nice in the Pippa Pants...so I'll ask Husband's opinion about that first.  He REALLY loves the Pippa look on me. 

And for me, I have lunge and squat thighs, so finding a pair of loose but not-too-loose pant patterns isn't always easy. I either look like I'm floating in big pants, or like I have sausage legs. But the Pippa Pants fit my thighs perfectly - I can see many more in my future.  

Yay flattering for my Booty!

And with the right fabric, as I did with my Bella Sunshine Designs Sansa Pants , I'll be wearing my Pippas to the office whenever I am well enough to work in the brightly lit office environment again. Until then, Pippas and I will work from my home office in style.  

Because one should always dress stylish but comfortable for a productive day at the office!  

And all April the Pippa Pants are on sale - they come in Ladies, Girls, or a Bundle Package (Ladies, Girls, AND cute doll version). 


Tuesday, 25 July 2017

Savvy Patterns - The Grace Tankini

The Grace Tankini is a vintage inspired two piece swimsuit with a variety of options.

The top I tested (View A) contains a Pretty circle cut out in the back.


The alternate, View B top, has a ruched center area which is customizable to flatter your figure.  Both top views include a shelf bra.

I sewed lining and cups inside, and the fit (and directions for fit) were on par.

During testing, Audrey made sure that the fit and feel were right for all sizes - and this meant a multitude of pattern amendments.  We worked together, and finally had the perfect fit under the arms, and with the behind.

For the bottoms, I tested out a circle skirt, but you can choose from a sporty bottom with or without ruching, or a panty.


Each of these 4 bottoms can be made either high waisted or to sit on your hips.  I prefer high waisted to cover up that whole "eating poutine with a pint" thing and neglecting my Beachbody workouts for the last while.

Once my workouts are back on track, beyond just daily yoga, I'll aim for the solo panty version - as I tried the tankini on with my 5 out of 4 Pattern's Reversible Riptide bottoms, and the pairing is amazing! 

Savvy Patterns Grace Tankini, 5 out of 4's Reversible Riptides, and George & Ginger Daybreak Rashguard!


The cut of the circle was a bit weird to understand at first for some, but I'd already completed a Twirly Skirt recently, so the double folding for a circle without seams was easy for me to comprehend.  I still haven't hemmed mine, but to be honest, I used the thicker swim fabric I sewed Husband's 5 out of 4 Men's Swim Trunks from, and swim fabric tends not to shred at the edges, so I'll see how long I can hold out before the edges become frayed.

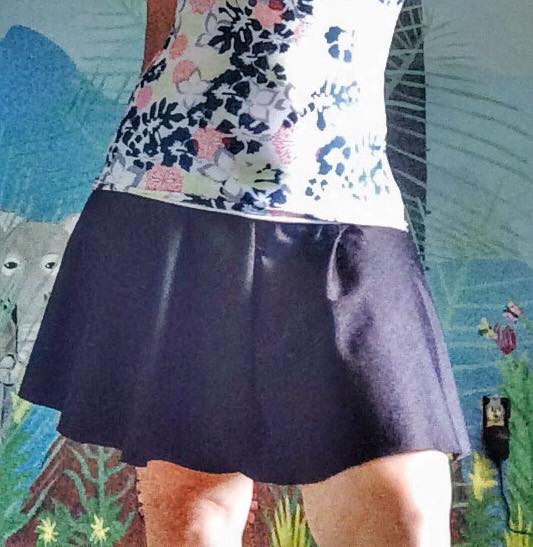
The skirt is twirly, fun, and makes me feel pretty.  Plus I like something covering my behind and thighs, so it's perfect for my comfort level. And Merlin seemed to enjoy our photoshoot for our Fit Pics :)


On the Savvy Patterns website, Audrey (aka pattern designer with flair!) provides tips and links to swim sewing tutorials
 
But honestly, the pattern is straight forward, and a good quick afternoon sew before you head out to the beach!

I can't wait until I have the chance to make the Ruched Version, as I would ruch every single article of clothing I had if I could!  It's pretty and flattering, and gives me confidence - and that's what Sewing My Wardrobe is all about.

Grab yourself a copy of the pattern and swim suit fabric (while it's still available! Winter is COMING!), and Sew On!


Tuesday, 6 June 2017

The Stunning Emma - Shirt and Layered Dress - Rebecca Page Patterns

Rebecca Page Patterns have to be the most delicate and soft patterns I have encountered to date.

Previously known as "Mummykins and Me," her patterns have evolved to include more than just childrens patterns, but patterns for the ladies, boys, and dolls as well.

Rebecca is based out of the UK, but she has worldwide helpers and fans.  No wonder I love her patterns - I have a thing for the Brits!

The Emma shirt/dress comes with several length options - Top (above hips), Tunic (below hips), and the option to add up to 3 layers for knee, calf, and floor length versions.  You can also sew up the sash, or opt to just use a belt.

I opted for the Top and Tunic versions, both using different fabric types.

As the pattern *is* flowy, do be prepared for sewing with a lot of fabric.  You can choose to use one fabric/pattern, or mix things up a bit, and use different fabrics for a bolder statement.

My first top was actually a Modcloth Dress that I tried to love for years, but the top part puffed out so much that I only wore it a handful of times.  I cut the dress apart, and used the beautiful chiffon print for the exterior layer, and the original slip fabric as the new slip fabric, neck line, and arm openings.


The Tunic length was next - with a random flowy, thin, soft, cotton fabric I obtained from my sister's old fabric stash. It is unlined.


I made two sashes - for the top, it twirls around me twice, with a cute bow at the side, front, or back; and the second one, I was tired, and only sewed the sash half the recommended length - but made it work, and it tied around my waist once, with a knotted end - I prefer the knots/bows to lay at the side.

My second top was definitely a quicker sew vs the first one, both because I didn't line the tunic version, and I was familiar with the pattern concept. 

This is one of the "easier" Rebecca Page patterns - and definitely a keeper!  I couldn't resist wearing both tops to work the day after making each of them - and received kudos both days.  Although created from the same pattern, with different fabric choices, it really DOES make a difference in the flow and feel. 

This pattern is very detailed with respect to how the fabric will fall and look on you - from chiffons and knits, to soft and cotton wovens - each fabric has its own look and feel.

Shirt Version makes its Canadian debut!


The dress versions do require quite a bit of fabric, however, they would be lovely for weddings, parties, and even a tropical vacation! 

I'm looking forward to creating a "slimmed" down version of the knee length dress (cutting less of the angle - less fabric, but more fitted), so I can make a lovely work dress from a few metres of linen I have been hoarding for awhile.

And of course, I will add in pockets - because who doesn't need pockets??  Speaking of pockets, I'll put my excitement out for Rebecca's pocket pattern tutorial set!  You MUST have it - because...POCKETS!

This pattern is for all sizes - from toddler to large handed adults - she didn't forget anyone! 

Each of Rebecca's patterns are created with precision and small details, making them challenging, but well worth it, as the end result leaves you making more than one - you can't have just one of any of her patterns! 


Twirl On!


Tuesday, 16 May 2017

The Belle of the Daily Ball - The Amelia Shirt & Dress - Bella Sunshine Designs

When I saw the video of a woman spinning in a field with a perfectly spinning dress, deep (but not too deep) neck and backline, and forgiving flow when not moving (aka ability to hide those bumps and lumps!), I was sold on the Amelia Dress created by Bella Sunshine Designs.


Once I finished my top, I even did a graceful video of myself twirling and doing Mario Brothers moves at the end!


Bella Sunshine Designs creates vintage-inspired clothing patterns, that offer different options, a variety of sizes, and a lot of work behind the scenes to bring them forward to the general public.


I have a lovely hour glass figures, and nothing is making these hips ever go away, so instead, I will sew to flatter them.

Before I tried my first Peplum style pattern, I was against Peplum styles due to my hippy hips and big thighs, until I started sewing them - the wonderful thing about PDF patterns, is you can grade patterns to fit you! 

The awesome thing about the Amelia pattern - no grading required for me!  As the band lies underneath the bust line, and the skirt flares outwards, pending you are using the proper fabrics (stretch knit), there should be no issues with the skirt hugging your hips or thighs  - it will flow with you, and really accentuate your natural bust and waistline. 


I was fortunate enough to test Amelia to help work out any final tweaks and issues, and together, our group helped Danielle and Melissa hone in on the perfect design.  They were lovely to work with, and took everyone's input and life into consideration during the process.

This pattern shows you the basics - how to measure yourself, printing and cutting of the pattern, how to layer the pattern for your perfect fit, basic terminology, finished measurements, and photo examples. 

The Amelia consists of:

- Shirt (hip), knee, or maxi length

- Sleeveless, short sleeve, 3/4 sleeve, or long sleeve

- Top requires knit stretch fabric

- Skirt can be either stretch or woven fabric, as it is sewn to the stretch knit below-bust band


If you are feeling too exposed at the back or front, you can add in a panel of stretch lace to keep the glam, but feel more covered up - the options are limitless.  I feel lace would be a sultry addition to the back and really dress it up more! Or attempt a corset-style back if you know how to make spaghetti straps.

Want pockets? If you know how to sew in side pockets, they can easily be sewn into the side seam - just determine where your hands sit, and go from there.  It may make more sense in the knee or maxi length, otherwise, they would be awkward elbow hinged pockets in the shirt version.

The more you learn while sewing and honing in your skills, the more your imagination runs wild!

The only steps I had troubles with both times around, thanks to my brain fog, was step 6. It's a doozy, so make sure you read it thrice and ensure your fabric sides and lining/fabric are placed as in the picture. No one likes bringing their ripper out!

Other than that one step, I have had no issues sewing up Amelia.  and hey, Husband loves the boobilicious end result. 

Whether you are hourglass shaped, straight hipped, or apple shaped, this design is flattering and can be made for play, work, or even fancy it up for a black tie event!

For my first Amelia, I made the Shirt Version with 3/4 length sleeves - it fell just at my hips, giving me just enough coverage and comfort while wearing it, but still showing off a bit of my booty from behind.


Back


Serious Front

I opted to bring out the geek within, and used all Water Tower Textiles Fabrics thanks to the lovely Patty!  She brought in several meters of Mario Brothers stretch knit for her Facebook Group and limited us to 1-2 meters per person so as many loyal customers as possible could take advantage of her findings.

Along with Mario, I paired it with her new Heather Denim Cotton Spandex, which is a medium thickness, yet flowy knit, that is both easy to work with, and flows evenly.  It doesn't droop, but isn't too stiff - so perfect for Amelia!


I brought out the Mario Within!


My second Amelia was sleeveless, as I was lacking sleeveless shirts.  Husband also approves of this version.


I repurposed an Old Navy dress I looked awful in, random stretch black knit for the band, and some sweet complimentary chiffon type fabric for the skirt part. It it fun to wear, and looks cute with shorts, jeans, leggings, or a pencil style skirt. 

Overall, as long as you take your tie and follow each step, Amelia comes together in an afternoon - and the results are divine.

***I am a Bella Sunshine Designs Affiliate, and promote designs I love - I am not part of BSD


Monday, 24 April 2017

Pattern Testing for 5 out of 4 - Escapade Top & Dress!


I've been ogling 5 out of 4's sporty-style patterns for some time now, and was fortunate enough to be accepting into their most recent pattern testing of the Escapade Bra (Bikini), Tankini, and Dress Pattern

Jessica's testing is pretty intense, but in a good way.  You are expected to work, provide your feedback, create your muslin (fake clothing article to ensure proper fit and so you don't cry if the sizing is off on your good fabric), and create several versions of the final product to ensure:

a) everyone understands the pattern

b) any incoherent instructions are clarified and revised as required

c) she can see how the pattern fits on different sized bodies

d) you don't sew up the muslin pattern one or two nights BEFORE the final is due

We look through each version of the written pattern for:

a) typos

b) confusing pictures

c) steps in the wrong order

And so on.

She puts forth what her expectations are, and in turn, it's polite to ensure you can realistically meet her expectations.


Seriously - her patterns are reminiscent of my old favourite "Lulu" clothing, but SO much better and custom made! I love being part of the "how they made that" part of clothing construction, and being able to say, "Boo Yah!" to the fact that I learnt a few more awesome clothing hacks and skills during this round of testing


I like it, as I enjoy being meticulous, am a stellar proofreader, and love the challenge of whipping up 4-5 pieces of clothing in a short period of time. For seriousness.  My drive comes from high workloads - both at work and play. I'm just built that way.

For Version 1, I created a tankini (top?) with Small bust to Medium Waist through Hips based on the sizing chart. I also added a band to the bottom, as I prefer tunic length tops. Being 5'-2", this means a lot of the patterns (generally written for 5\-6" to 5'-8" height) are awesome for me!


The instructions were pretty clear - I would definitely pull more on the ruching elastic to get a better ruching effect on the sides, but it fits comfortably for me!

The only tedious part was flipping the fabric for the ties, but it's my least favourite task as well. (I since found a You Tube Video that helped make tie flipping go from a 30-60 minute task to a 2 minute task 65% of the time - I'm honing in that skill.

I'm using the small top going to a medium at the bottom of the tank - I could go small all way through for a tighter fit, but I like a looser fit for those slothy feeling days.

Also a less stretchy/flowy fabric will tighten it up as well.

I used a c/d cup fir my muslin version, however, after confirming with Jessica, sized down to an a/b cup for my next tank and bikini top, pulling everything together much better.

I'm not falling out at the top, my seams are sitting flat, and I honestly feel like I'm not wearing a top - so comfortable and no strain on my neck or shoulders (desk job issues).

I wasn't even thinking of making the dress version, but with this cut, I definitely will now!

For Version 2, I created my Tardis Tankini. I'm in love. It's just amazing.  A few minor  changes were made to the pattern and instructions at this point, making each step a bit more concise and easier to follow for a lot of the testers.

The fabrics are an awesome Tardis (top part) print that Patty Hamm from Water Tower Textiles brought in especially for her FB Group followers (along with Mario Brothers!) - I almost had a heart attack when she score a small amount of yardage for us!  She really is a sweetheart and always available to answer questions - people like Patty are what customer service SHOULD be like. It's how *I* was when I ran Crystal's Bird Toys for almost 6 years (I even received a customer request email today begging for a toy to be made...almost 3 years after my initial closing announcement!)

The bottom part is another Tardis fabric, from Spoonflower - made of wicking activewear fabric. 

I LOVE the criss cross back! 

Tardis tank & altered tardis leggings (thank you, China)

Had to pose with my Tardis in the parrot room jungle!

Finally, version 3. I had a grumpy photographer - next time I'm bringing a friend to the beach for pics!

I decided to make the Riptide Reversible Shorties, a pair of bathing suit bottoms I had been eyeing for awhile, because they have ruching AND are reversible!

Grab your patterns from 5 out of 4 today! You won't be disappointed!

I used Cycling swimwear fabrics I found at Water Tower Textiles and Purple/Black fabric from a FB destashing group. 

I do like that the shorts make my behind look nice - and although I made the cup insert version of both top and bra, I didn't put them in. And it was cold - maybe 7 or 8 Celsius. No evidence of cold! 

Booyah!

Love the shorts AND top - it's perfect!
This turned out amazing! 
Honestly, once again, I'm amazed I made this - seriously??? 

In comparison with 2 other bikini patterns I have muddled my way through (minimal directions, and guess work for half of the steps), this pattern was easy to read through Step. By. Step. 

Don't skip steps. Don't plow through too quickly. And choose sizing wisely.  With the pictures, instructions, and Jessica's constant availability to answer questions (even on her regular FB page, not just the testing page!), there is support for anyone interested in making their own bikini, bra, tankini, or dress. 

There are links to Youtube video instructions, and the support of the other members of the regular FB group - we are all at different levels of learning, and it really warms my heart when we are able to help each other wrap our heads around new concepts in pattern design.

Thank you again, Jessica, for another amazing pattern.  You have me - hook, line, and sinker!  And unfortunately, I now feel like this:


Awesome Patterns