Monday 27 May 2019

Sew Free for Summer: The Rebecca Page Blog Tour

I have troubles fitting into store bought corsets thanks to my smaller bust and bigger caboose. 

I knew when I saw the FREE Rebecca Page Patsy Dress pattern that one day I would remake my wedding dress based off of the Patsy pattern. 

It wasn't until recently that I thought I'd love to hack the pattern into a corset top. 


Today, it's all about the Rebecca Page Sew Free for Summer Blog Tour.  I mashed together the original FREE Patsy Party Dress bodice with its Mermaid Skirt Add On.


I had a beautiful reddish dress that I wore for a wedding a decade ago.  I will never be a size 2 again. But the dress was too pretty not to use again. 


So I cut it up.


I also needed to alter the Patsy pattern to make it into corset/top length. 

I took the bodice pattern, and corresponding Skirt pattern from the Patsy Pattern Add-On pack, and clipped them together. 


Make sure to overlap the pattern pieces by 1/2" (seam allowance) so the curve of the pieces is correct. 


I then measured an extra 9" onto the skirt portion of the pattern to make the bodice hit my hip bone. 

How did I come up with 9"?  I put the bodice pattern piece on the appropriate area on me, took a tape measure, measured down from the bottom of the bodice portion of the pattern, and figured 9" would give me enough for an 1" bottom hem.


I then traced the two clipped pattern pieces onto a few pieces of computer paper, labelled the pattern, and repeated for the other 4 pieces. 

So I now have revised Center Front, Side Front, Side Back, and Back Pieces - all top length 


I started my sewing day the traditional Canadian way:


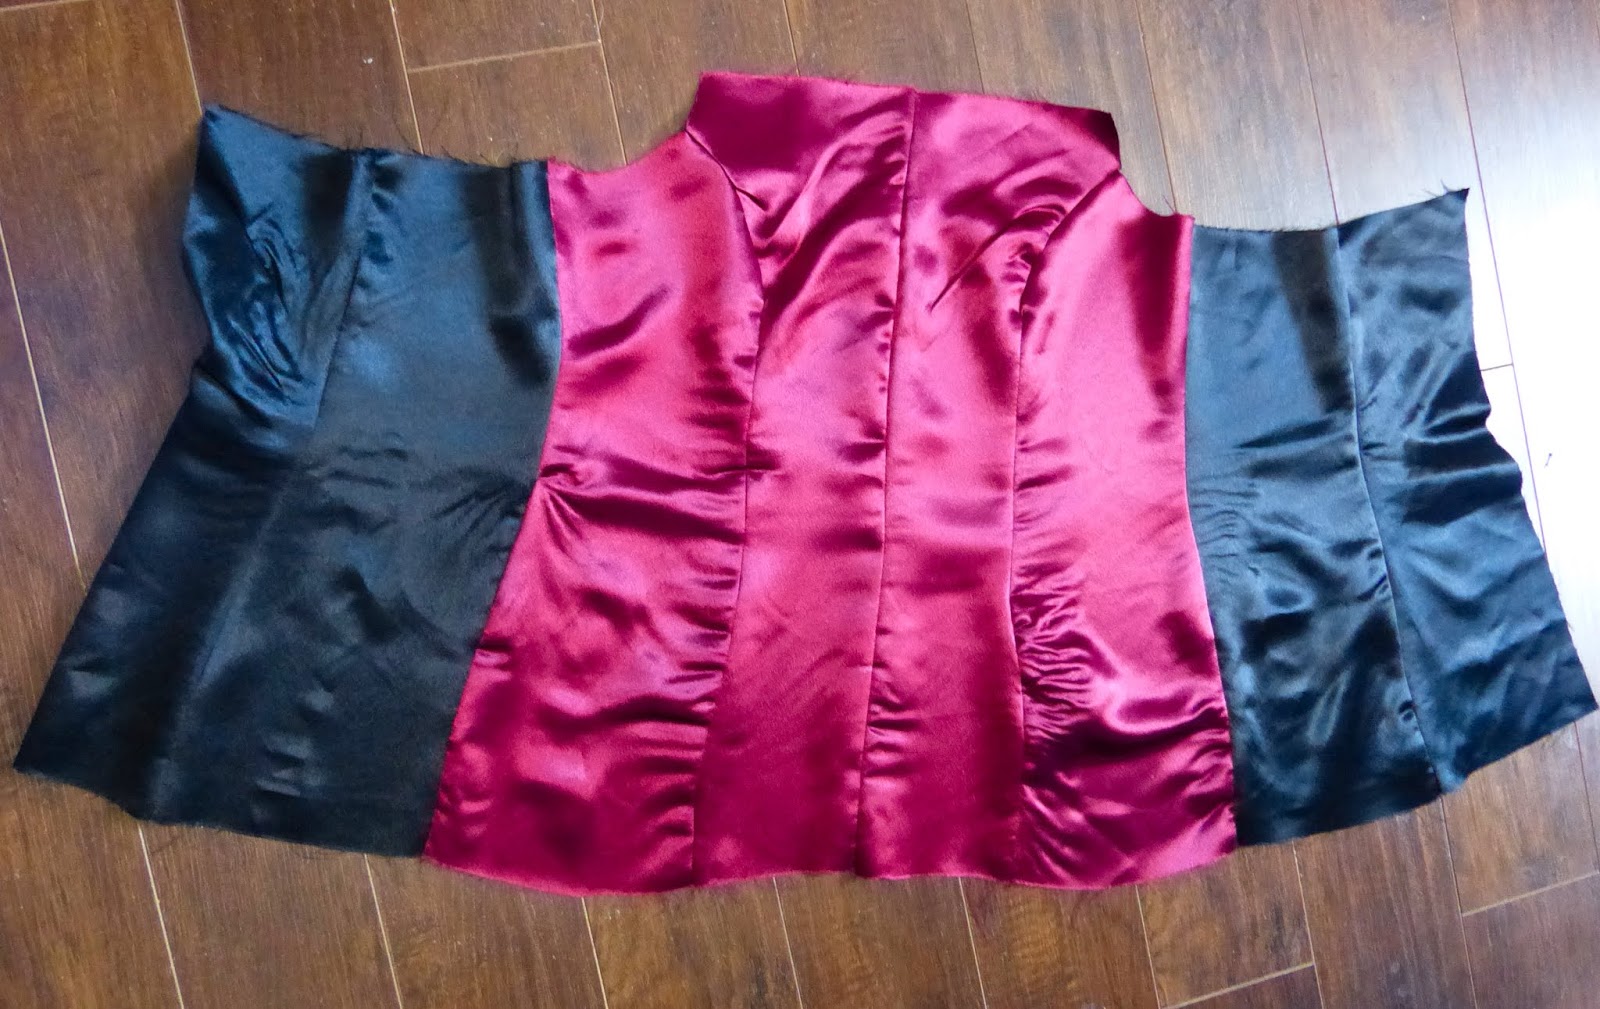
I then cut out my pattern pieces...during which, I realized there wasn't quite enough fabric from my old dress. 

So I improvised. 

I had a cotton fabric similar in reddish colour, and some black and silver lace fabric...cut both out of the front side pattern pieces, and basted the lace on top of the boring cotton fabric. 

They are now treated as one piece.  


I also lacked enough exterior fabric for my back panel...so I sewed together two pieces for each side, and covered the seam with some black lace.


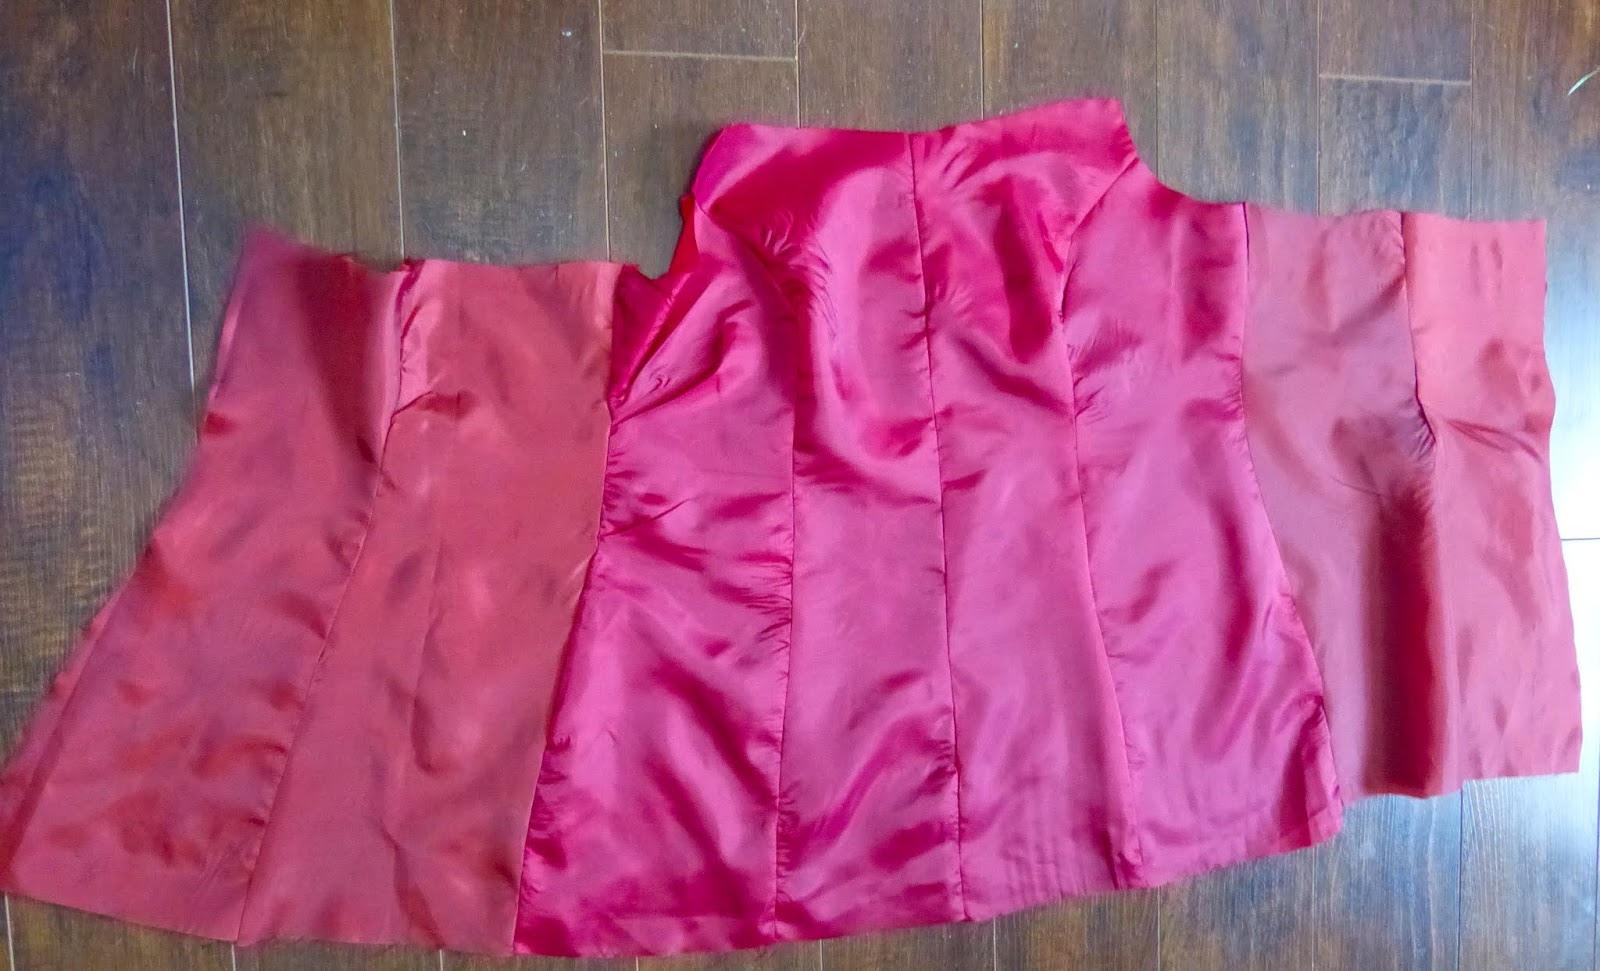
I then followed the pattern instructions to create the exterior, interlining, and lining of the top. 

Oh yes, I also lacked enough of the same colour fabric for the interlining and lining - so used what I had on hand. 


I continued following the bodice instructions until it got to the skirt part. 

With no skirt, I had to hem the bottom and also shorten the width of the back panel for the corset back. 

I wrapped the top around myself, and gauged how much I would have to take off the panel, with enough room for an inch on either side where the grommets were going to be. 

Once I figured that out, I pinned the sides, and stitched 1/8" from the side, and 1" from the side to make a nice area for the grommets to be installed. 


After stitching the side, I then folded up and pinned the bottom hem, and the bottom hem was done. 


Grommet time!  

Most grommet packs have instructions on them  - follow the instructions. 

Side note: These took me some time, as there are 7 on either side, and I had to carefully bore out 14 holes - through 3 layers of fabric. 

Netflix and Prime Video are your friends during sewing time!


I also added in some lingerie elastic where the original sleeve placement marks were - and reused the original straps that came with the dress.  

This way, I can either have straps, or remove them if I don't want them. 


And that's how to make a top length AND corset version of the Patsy Party Dress. 

The Patsy Party Dress Pattern is FREE here.

And the Patsy Party Dress Add-On, where I was able to fully draft a nice curved top bottom is here.

I've paired mine with my Pippa Pants for a more casual look, and you can make the top just a top with zip back as per the original pattern, or add the corset into the dress!  

Pair the top with the Stevie Skirt or High Low Skirt for another fun two piece ensemble.  The choices are endless!


More Inspiration

Please visit all the stops on the Rebecca Page Sew Free for Summer Blog Tour for more great inspiration:

Prizes

We will be giving away a pattern bundle of choice each day PLUS an overall grand prize of a $50 pattern credit. To stand a chance to win, all you have to do is comment on each blog, each day so stay tuned to the Rebecca Page Sewing group for updates from our bloggers!

***Affiliate Links Above used - I love these patterns, and without the help of those who love their patterns, marketing would be extremely difficult for the pattern makers we love and learn to love. Affiliate links help with the hours, fabric, and tears that go behind testing each pattern in order to provide a real-person view on the patterns for you (and me!) 


Friday 24 May 2019

It's Love - The Lily Leggings by Rebecca Page Patterns

OMG Becky. Look at Her Butt. 

I do feel pretty amazeballs in the Rebecca Page Lily Leggings.  

I did not make a muslin version (aka practice pair), knowing that I can trust both the RP sizing AND their description as to how their garments fit. 

The Lily Leggings are just magical. 

And come with a plethora of options:
- Plain (nothing fancy)
- Chevrons for front and/or back
- Bum panel
- Cuffs
- Elastic or non elastic waistband
- Back pocket


I opted for the chevrons on the back legs, bum panel, no cuffs, no pocket (I know - shocking that I did not put pockets in something).

Look how amazing this pattern makes my behind look - yes, I'm asking you to look!  The curve fits perfectly while sewn in, and I didn't even clip the curve corners.  

I topstitched everywhere for a professional look, and I'm pretty proud of myself.


I paired mine with the Talia Top, which makes me feel really good in these as I try to gain my balance and momentum to get back into pre-Vestibular Migraine shape. 

And hey, I found out Talia can also be tied in a knot when Shawn T gets me really sweaty working out.

I do have to keep in mind, a year ago, I could barely walk a block or even up and down the stairs without almost falling or shuffling. That's led to a 30lb weight gain. 

But Always look to see how far you have come.

And How amazing I feel in these leggings.  

There's no weird pressure on my waist/hips (my hips tend to hurt when compressed in leggings), so I'm able to be flexible without pain. 


The fabrics I used - I have no idea what specific types they are, other than athletic-specific fabrics.

The main front blue fabric is from Zenith & Quasar - from a mystery pack I ordered from a sew-a-long I won for my Doctor Who outfit.


The black zippy fabric is a Black Stripe Knit from Black Rabbit Fabrics (Canada) - and actually cut from my first pair of leggings that I made 2.5 years ago that just weren't working for my body any more. The fabric is still so durable and in great shape, I felt it would want to be leggings again. 

And finally, the Pac Man Fabric....is from a pair of leggings I got from Wish.com that never fit right. At one point I did put a side seam in with extra fabric and changed the waistband...but wasn't happy with the fit still. So Pac Man got folded up, and called my name when I was putting Lily together. 

So - reduce, reuse, recycle - don't throw out awesome fabrics (but don't hoard either! Unless you're organized about it). 


I am still in awe of this pattern - I feel I have found my new leggings pattern as they just make me feel amazing. And I can use up scraps of fabric to make fabulous visual combos. 

For example...the black stripes on the side - I did not have the full length in one line...but each side actually has two pieces of fabric cut, sewn together, top stitched where the seam is, and then placed as per pattern instructions. 

I did the same scrap busting with the back waistband - I made each of the two back waistband pieces by putting together two pieces of fabric, as I lacked the full length and top stitching to make them singular pieces. 

Boom!

I hope you try out the Lilys - my hips don't lie and feel you must give them a go!  

***Affiliate Links Above used - I love these patterns, and without the help of those who love their patterns, marketing would be extremely difficult for the pattern makers we love and learn to love. Affiliate links help with the hours, fabric, and tears that go behind testing each pattern in order to provide a real-person view on the patterns for you (and me!)  

Thursday 23 May 2019

X Marks the Spot - 5 out of 4's X-Factor Tank


The first reason I was attracted to 5 out of 4 patterns a few years ago was the versatility of their patterns, unique design features, and swim separates that were actually flattering. 

I've been wanting to make the X Factor Tankini for eons, and finally got around to making not just one, but two!  

The different options the X Factor entails are:
- Bikini (or Bra) top
- Straight, gathered, or maternity tankini
- Nursing options
- Bust ruching
- Built in bra cups (removable or sewn in)

I sewed up a Small bust Graded to large waist & hips - for the perfect fit.


My first version can be worn for either swim, working out, or play.  And I LOVE it!  

It's taken me a few years, but I can finally scrap bust in a colour co-ordinating way!  

The fabrics used for this amazing X-Factor Tankini (yes, I'm tooting my own horn) include:

- Random dance fabric from my sister's old stash from her dance clothes making days - the floral, red, and striped fabrics

- Athletic fabric - thinner than normal dri-fit - for the cool circuit fabric - from a mystery pack I received from Zenith & Quasar Fabrics thanks to a sew-along I won last year for my new Doctor Who outfit. If I could get their fabric ALWAYS, I would. I just need to win Lotto Max first (ha ha)

- A lightweight spandex, also from Zenith & Quasar fabrics.  It's super soft and blends perfectly with this colour combo.


I LOVE the way this fits me - like a nice glove!  

I paired it with the Tidal Wave Swim Shorts - another super easy pattern that can easily be workout or swim shorts.  

Sewing the X Factor itself, wasn't actually as time consuming as I thought it would be.  It required minimal elastic, clear instructions, and the sizing was right on.

Although the "X" part looks complicated - it really isn't.  

The binding is wide enough that it's simpler than a camisole binding, and not a lot of stretching is required while sewing it up, thus, minimal room for weird stretching errors from occurring (ripples, creases, etc.). 


My second version is more geared towards summer fun.  

The purple and bicycle fabrics are from Water Towel Textiles - swim/spandex fabrics.  The purple is super soft, and the bicycle fabric I hoarded over the last few years (purchasing it 3 times!), as I loved it so much!

The Black binding is from my scrap bin, and likely remnants of sister's dance fabric stash. 

And finally, the meshy mermaid fabric is from the same mystery pack from Zenith and Quasar.  I could of sized out a bit more for this due to its lack of full stretch, but that's ok with me as-is

I've paired it with my first 5 out of 4 swim shorts pattern - the Reversible Riptides.


I did the front bust ruching in this version, and it looks pretty amazing!  

With the exception of the meshy fabric not being quite stretchy enough, the fit is perfect!  


So, I'd definitely recommend this flattering pattern. Both to challenge your sewing skills with something new, and a versatile pattern that's more than just a bathing suit. 

Grab the X-Factor here!

***Affiliate Links Above used - I love these patterns, and without the help of those who love their patterns, marketing would be extremely difficult for the pattern makers we love and learn to love. Affiliate links help with the hours, fabric, and tears that go behind testing each pattern in order to provide a real-person view on the patterns for you (and me!)