Saturday, 4 August 2018

Sewing Pattern Review: Rebecca Page's Eloise

The Eloise - another Rebecca Page Patterns creation put together with thought and whimsy. 

This pattern includes:
- Newborn to 12 year old sizing
- XXS to 5XL sizing
- 18" Doll version
- Elastic casings or Shirring to give a unique look to each sew
- Elastic, shirred, or loose sleeves 
- 3/4 length or short length sleeves
- Flowy Knit or Woven fabrics can be used
- Top or dress length (mid thigh, midi, or maxi)


For my first top, I used random really light woven linen from my mother-in-law's sister's stash she gave to me a few months back.  Who knows how old this fabric is...


I sewed this up in my normal medium, but felt I didn't have to grade just due to the shape of the top.  

The shirring was neat to do - in  a different manner than I shirred previously with my Monte Carlo Top.  

But it was actually easy - so don't be scared of trying a new technique!  I just adjusted the tension so it was a higher number on my machine, and kept everything else the same.  I put light tension on the fabric as it was headed towards the needle, and voila - 3 lines 1/4" apart of lovely shirring for the neckline and waistline. 


Besides the shirring, so rest of the top was a breeze and went by quickly. 

The look of the top *is* to be oversized, and off the shoulder. 


My second top I made from a fun medium silky fabric that was a cinch to sew up. 

The shirring I made tighter, and the top I sized down to Small for a less-off-the-shoulder look.


I really like this look - and the first night I wore it out, I got compliments from several people - winner!  

I like the flow of the sleeves - they're not too billowy, and perfect for warmer weather.


 And as you can see, they pair well with jeans, skirts (like my Paige Pencil Skirt), and even casual pants, like my Pippas 


I love how the shirring looks on this top - I think I have this technique down now!  I love how Rebecca Page Patterns challenge me in some way - and hone in my sewing skills.  The instructions are great too - like someone holding your hand as you sew, making sure you don't miss a step. 


Then I made the 18" doll version of both the Eloise Top and Maxi Dress.  I didn't even need instructions at this point, as I'd memorized the Eloise pattern steps by this point - it's THAT easy! 


The dress is the perfect length for this doll - I'll call her, "Stella," after one of my nieces. 


The top is a great scrap buster, and stays on Stella without any issues. 

Just make sure to iron the hem after sewing up the top to flatten it down, and it looks store bought. 

So, if you'd like a flattering fun top and to learn a new sewing technique (or refresh your old technique), Eloise is for you!  

Oh, and I ALSO sized down the 18" Doll Pattern to 60% of the original size, and I bring you Barbie sized Eloise!!  Isn't it pretty??


Tuesday, 31 July 2018

My Last Minute Rocky Horror Picture Show DIY Costume & Decor!


We have a projector screen at our camp, and had 3 people request the Rocky Horror Picture Show.


We held it a bit later in the month than we originally planned due to life happening, but when Rocky week came, I decided last minute we needed decorations and I needed an outfit.


Yay me!


I made basic signs related to the movie from posterboard in order to direct people to our camp (it's really in the middle of nowhere with no interweb, and good luck getting your GPS to work). 


I put the Jump to the Left sign right before our camp - because you really did have to turn slightly left to get to our lot.


Seating set up for the guests.  I even put out some props, like party blowers, unicorn hats (why not??), sparklers, Melba Toast (which Gideon proceeded to eat throughout the movie), and bubbles


Of course I had to make the Time Warp directions sign. Just in case.  Basic posterboard and some scrapbook paper for the shoes.

My Columbia outfit consisted of:
- 5 out of 4's Rosanna Top
- Rebecca Page's Peggy Pencil Skirt (mini)
- Bella Sunshine Designs Eden Leggings
- Dollarama straw hat I covered in sparkles and put a cute sparkly black band around.


For the Rosanna Top, I colour blocked several sparkly fabrics together for the bodice and skirt, and it's brilliant!

More seating around the fire pit - you can see the screen on the right side


Our 120" projector screen!

Fire ban was on, so I put citronella candles on a well staged fire pit.


Just in case...updated our chalkboard paint message board!


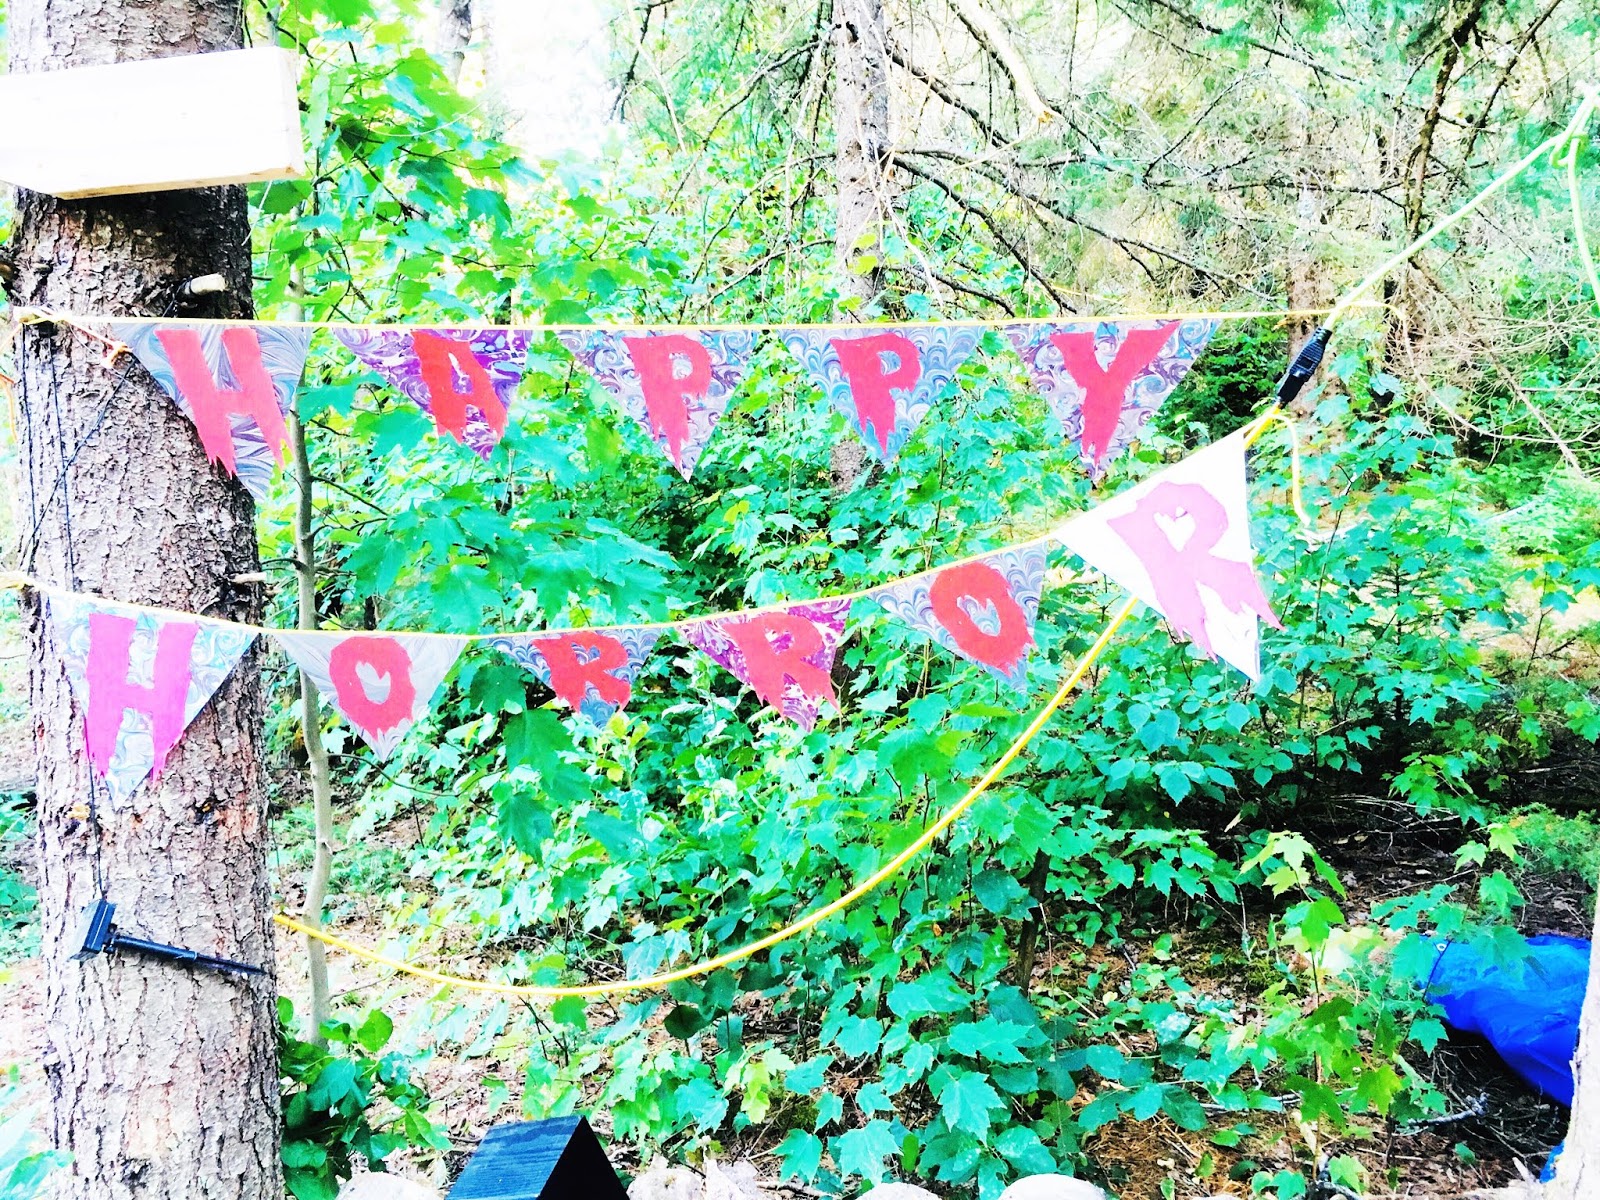
Happy Horror sign - used the Rebecca Page Bunting Kit for the flags and direction, and just printed out some scary lettering on size 500.  Cutting them out by hand was a pain, but it added a cute effect.  

Then people started arriving - these ladies are a hoot!  Bras on the outside, and beads for all!

Husband will kill me if he sees this. We got him into it, and he wore a boa for at least a minute

Who doesn't have a 3 feet long dinosaur?

And let the movie begin! 


It was a great night with minimal (to me) decorating prep time - in total I spent about 5 or 6 hours getting the signs and costume made up, and it was appreciated by all.

Sunday, 29 July 2018

Sewing Pattern Review: Rebecca Paige's Pencil Skirt

Who doesn't like a flattering contoured skirt?

The Paige Pencil Skirt is that and more. 


It's a high waisted pencil skirt with slimming side seams, back vent, zip up back, darts, and even an optional "bow" at the front if you like. 

All the seams are hidden for a professional look.

It has options from 18" doll6 months to 12 years old, and up to ladies 50" waist sizing. 

Get all 3 in a Bundle!

Made with woven fabrics only (and lining interior), it fits just below the knee and has no wiggle room to "stretch" if it is too small. 

I found my normal L to XL grading for RP bottoms gives me the room to move without suffocating my mid section. 


I'm 5''2" and took 2" off the lengthen/shorten line to accommodate for my height (it's drafted for a 5'-6" height) 

With this pattern, you learn a different way of sewing in a zipper, unique back vent sewing skills, and in the end, a fancy looking pencil skirt 


The most challenging part of sewing up the skirt had to of been the vent during pattern testing - however, Rebecca came through and the final pattern has VERY detailed pictures and instructions (giving me that "Aha" moment of clarity for a rather simple sewing technique once the details were clearly laid out), so it shall not be an issue next time. 

For my skirt, I used a random suiting fabric for the main skirt, proper lining fabric for the lining, and flowy sheer fabric for the bow part - I really like the contrast and the look of the sheer bow. 


Overall, I love the moveability, length, and feel of this particular pencil skirt. It doesn't make me feel self conscious about my thighs or caboose, and I feel it gives me a flattering shape and look. 

It's also easy to walk in without shuffling, and I can get in and out of the car without doing pre-Olympic trials with my legs (anyone who has worn a pencil skirt knows what I mean!).


I've paired mine with the Neve Wrap Blouse (tucked in at the back) - I think it's a great pair for a casual day at the office or out with the girls!

Grab your Paige Pencil Skirt and give it a go - you won't be disappointed!

Sunday, 22 July 2018

Sewing Pattern Review: Rebecca Page Family Passport Wallet

Travel? 

Have lots of important paperwork you need to have in your purse regularly?

Love your make up brushes to be organized?

What about your art supplies?

The Rebecca Page Family Passport Wallet is a simple sew, and a great way to use up scrappy fabrics, and fulfill the above needs!


I like that there are options for the closure - magnetic, button, snaps, or ribbon (and beyond!), and that it's large enough to hold all of our essential paperwork all in one handy personalized location.


The instructions are simple and easy to follow - but make sure you use the proper interfacing and fabric as per instructions!  

For my first wallet attempt, I had just inherited a Rubbermaid container (one of those big blue bins) FULL of fleece fabric from my mother-in-law's sister.  

Yay for her downgrading her house and sewing supplies!  

Boo for me using fleece instead of the instructed interfacing as the interfacing inside the lining and fabric pieces. 

This made for a much thicker than intended wallet - definitely not suitable for passports. 

But perfect for holding my paint brushes - or make up brushes, crayons - you get the picture. 

I used a normal cotton for the exterior, and the lining is a soft silky lining fabric that I only had scrappy bits of.


You can also hack the wallet and shorten the length to make it into a wallet, or just keep important papers, like insurance documents or receipts!  


It's a quick and easy sew with a bit of ironing and interfacing for a clean crisp finish. 

The pockets are easy to make, and keep everyone's paperwork separate and easy access.

I especially like the use of scraps to create this pattern.

For my passport wallet, I used all cotton - a striped blue print, owl print, and a Caique parrot tropical print from a dress I bought on impulse several years ago, but could never wear as it looked like a moo moo sack on me. 

Caique fabric makes a great tropical passport wallet though!


Overall, it's a quick sew and one more way to help get your life more organized!

And really - you'll be the most stylish traveller in the airport!

Get your free Passport pattern here, and whether it's for passports, crayons, make up brushes, paint brushes (or more!), it's an easy scrap buster sew with a well finished end result. 

Wednesday, 18 July 2018

Sewing Pattern Review: The Neve Wrap Blouse

I love a nice flowy shirt that doesn't feel bulky.

Enter Rebecca Page's new pattern, the Neve Wrap Top.

On Sale throughout July 2018 for 30% Off!!


It's best made with flowy fabrics, like this chiffon type fabric I scored at Fabricland a few weeks ago! 

What more screams summer than Sunglasses?


Neve features:
- Options for either wovens or knits
-  Sleeve tab options


I prefer the tab feature, as it brings the loose sleeves up and makes the top a bit less billowy. 


The back is sewn with a middle seam, and is intentionally lower than the front - it can easily be tucked into your skirt or pants for a full billow look front and back.


I like the look of the back untucked - do you?

I used hemming tape for the hem so it sat still - especially while sewing it up - otherwise, it would leak to a wonky hemming job that I'd prefer not to have.

After sewing the hem, I ironed, ironed, ironed, and it sits flat now.


The front billows, and wraps around - I definitely recommend wearing a tank top or camisole underneath in order to prevent spillage from you-know-where.

It is sewn with an elastic waistband, and may be a higher rise than I generally wear, therefore I didn't cut the pattern piece on the shorten line (I'm 5'-2") so it sat as low as possible.


You can see the sleeve at the side - both arm up and down.

I've paired this with the new Peggy Skirt, which is sort of high waisted and a good fit with the Neve Wrap Top!


My recommendation:

- Sew slowly with lightweight fabrics!
- Use a lightweight fabric - anything medium weight or more structured will simply look boxy, and not feel so flattering
- Learn to love French seams - I've sewn so many in the last few weeks, I love the look of the finished seams inside! 
- Size down if you want a less billowy look (I went with Small vs my normal Medium, and didn't grade for my hips/waist to XL as I normally with with Rebecca Page Patterns).


The Neve Wrap Top is a lovely cover up top for the beach, summer party, or running errands

Sew on!