Showing posts with label sewing for kids. Show all posts

Tuesday, 26 November 2019

Get Your Beauty Sleep - the Rebecca Page Sleep Mask

Being a sleepy girl with a busy life is hard. 


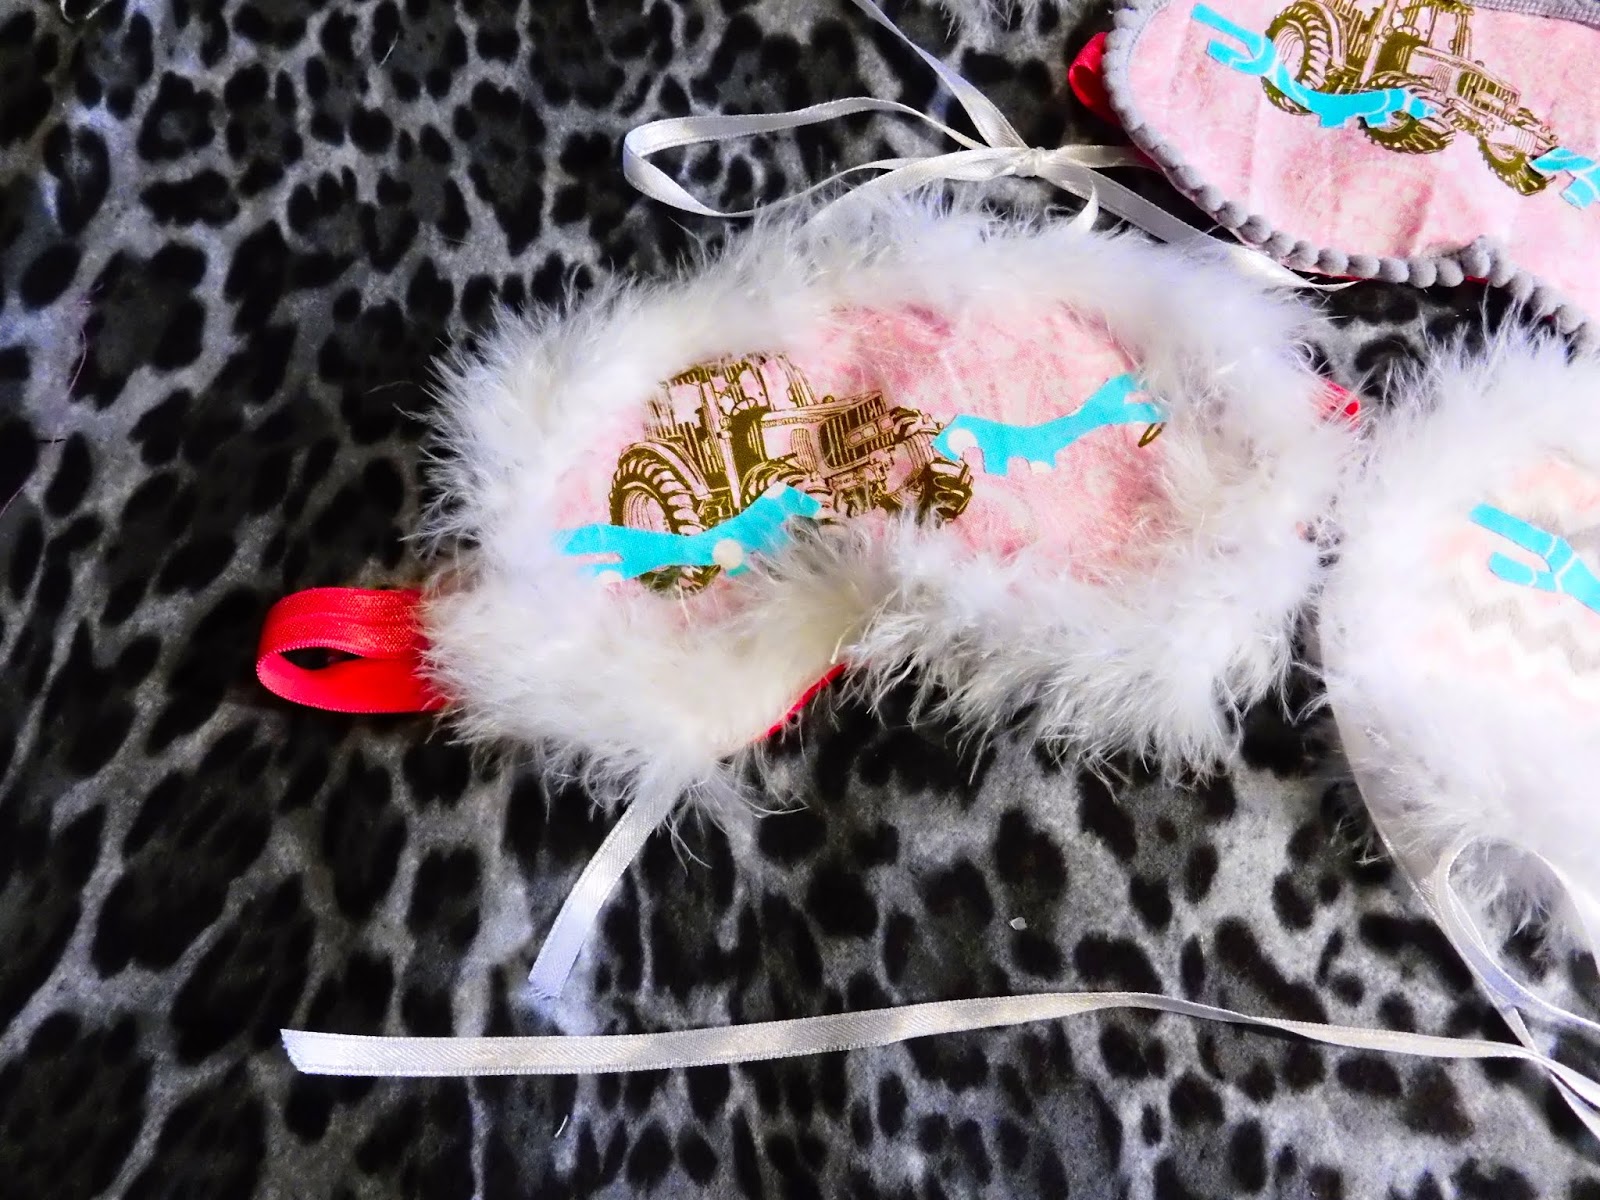
The new Rebecca Page Sleep Mask certainly helps me zonk out easier at night though!

Make it as simple or as Intricate as you like!  

With templates for eye lashes and your imagination - the sleepy sky's the limit.


I added pom pom trim and fluffy feathery trim to mine - the fluffy trim definitely tells people you are sleeping though (it moves as you exhale - ha ha).   I took out my glue gun for these trims, although they could easily be sewed on.  With minimal wear and tear, I feel my Dewalt glue gun's power will hold on these trims for many years. 

I used iron on fabric for the eyelashes, but you can embroidery them on or even sew them on if you're so inclined. 

I used elastic for my nieces masks, and ribbon for the adult masks (for my friend and I for Girls weekend at the cabin). 

The main fabric is just plain woven cotton fabric scraps I was gifted. 


The backing is a nice satin lining scrap - red to be scandalous!  It's SUPER soft on my skin.  

As long as you use lots of pins before sewing, satin is relatively easy to sew with, and leaves a comfortable finishing touch. 


I was really tired on Girls weekend after Mimosas, so the Sleep Mask really helped me sleep in the middle of the day with no curtains up in the cabin. 

Great gifts or for yourself - betcha can't just make one!

Get your own Sleep Mask pattern here.

***Affiliate Links Above used - I love these patterns, and without the help of those who love their patterns, marketing would be extremely difficult for the pattern makers we love and learn to love. Affiliate links help with the hours, fabric, and tears that go behind testing each pattern in order to provide a real-person view on the patterns for you (and me!) 

Tuesday, 28 August 2018

Sewing Pattern Hack: The Emma Top - Barbie Style!

I'm trying to learn how to properly downsize 18" doll patterns to fit Barbie, as there are so many cool patterns out there that I'd like the extra challenge. 


This is my second pattern I've downsized, and am happy with the fit so far.


The Rebecca Page Emma Top/Dress comes in 18" doll size, which I in turn customized the pattern by reducing it to 60% of its regular size. 

The pattern pieces are tiny, but easy enough to work with. 

And this top/dress is the perfect Barbie pattern, as it doesn't  have to be closely fitted (aka bust to waist) or require a doll version of a full bust adjustment! 


I used some scrap rayon/crepe type fabric from a dress that never quite fit me, but seemed perfect for a mini-Emma top! 


The sash definitely helps bring the Emma Top into the Barbie Zone, giving her a nice peplum top that happens to match with the skirt Barbie came in!


The back collar wasn't as difficult as I thought it was going to be to sew up - just remember to use your iron and a lot of steam to keep the seams flat and make topstitching easier.

The collar buttons up with a plain metal snap I sewed on by hand, and the keyhole opening at the back lays flat and looks just as good as it does on my own Emma top!

Overall, I feel between 60-50% shrinkage on the 18" doll clothing patterns might just work for Barbie - but I'll keep testing to determine the most flattering 18" to Barbie patterns over time.

Sew On!


Friday, 22 June 2018

My First Barbie and Monster High Sewing Outfits!

So I have decided for my nieces birthday to sew her up a wardrobe for her Barbies and Monster High dolls.


The last time I saw them, they were sadly wearing scrappy outfits from our Barbies circa 1980-1990! 


I don't think her Monster High Dolls have any new outfits.


So, I ordered a Monster High and Barbie doll from Amazon.  My, the quality on the lesser pricd ones is definitely subpar compared to mine - at least the dog could take my Barbie without fear that her arm would go missing! These ones are made from a hollow plastic vs the dense rubber weapons they were back in my day.


I totally just said, 'back in my day."


I'm officially old.


Ok, so the first item I made was a Free T Shirt I found on Pixie Faire.


If you haven't sewn before, the instructions may be missing a few steps for seing the hems, but they are straight forward and easy otherwise.


Sewing Barbie clothes might *NOT* be advisable for beginners though, as those darn hems take time to get right.


For the collar, I deviated from the pattern, and made a band (like I would for my own clothes) by measuring the neckline, cutting a small 1/2" wide piece of stretch fabric, folding in half wrong sides together, and placing right sides together along the neckline.


I then topstitched once I flipped the binding upwards to keep it from folding forward and for a more professional look.


For the back, it calls for Velcro.


I cut a piece of velcro in half lengthwise for a smaller width, and sewed on as per directions.


I then added some rickrack to give it a neater look.


Not bad for my first Babie clothing item in 25+ years...


For my next clothing item, I opted to see if I could downsize the Rebecca Page Cora Cocoon Cardigan I made for myself.


I mean, there's an 18" doll pattern, I just had to amend it to a smaller height.


I kind of goofed with thinking for some reason the Monster High Doll would be 14" (she's about the same height as Barbie, at 11.5"), so I set my printer to 77% to shrink the Doll Cocoon pattern pieces to the "proper" size, however, it turned out a bit bigger than anticipated.


Calculating 11.5" by 18" should actually be printed at about 65% to the pattern sizing.


I finished my first one last night in a nice light stretch Cotton Lycra, and although a bit big, it was simple to make.


I cut an inch off the perimeter of the Cardigan portion of the pattern piece, and 2" from the band piece this morning. I was honestly too lazy to go down 3 flights of stairs to reprint the pattern at 65% of the original pattern piece.


And I wanted to sew one more up this morning as we're heading to the camp tonight right after work.


And I started at 6:36am and finished sewing by 6:51am, giving me enough time to snuggle with my ailing Husband (just a minor injury) before heading downstairs to my office.


The second one is from a lightweight knit that has minimal stretch either way, but still works on a looser knit pattern.


This one fit much better - although I'll just reprint the pattern now as the arms are still a tad bit long.


Kids don't care though, and I have 3 nieces to makes Barbie and Monster High clothes for now.


Because I didn't have enough hobbies or sewing projects to work on apparently.


*sigh*


Sew On!


and stay tuned for more Monster High and Barbie clothing - definitely great scrapbusters and I look forward to sharing my experiences with you!